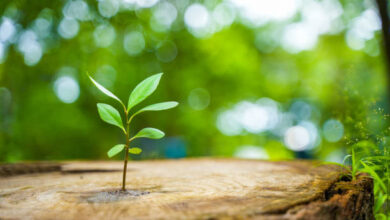
After a tree is chopped down, you’re frequently left with an unsightly stump that can ruin your landscaping. Burning this stump is one efficient way to remove it. We’ll walk you through the process of burning a tree stump safely and successfully in this blog post.
Knowing Why It’s Effective to Burn a Tree Stump
- Have you ever wondered why lighting a stump on fire is a wonderful way to bid it farewell? Now let’s get started. Firstly, burning is an affordable approach that won’t break the bank. It can be costly to use chemicals or hire professionals to grind the stump, but to set the stump on fire? Not in that way. Burning is also a green solution that won’t damage the environment, in contrast to some chemical stump removers.
- That’s not all, though. Burning destroys the root system buried beneath the earth in addition to the obvious stump. By completely eliminating the tree, you avoid any potential regrowth and spare yourself future headaches. You may now relax and take in your crystal-clear, environment devoid of tree stumps.
- And the final flourish? The burnt stump ashes might serve two purposes. View it as a gift from your prior tree rather than as rubbish. For your garden, the ash works great as a natural fertilizer. Thus, you not only remove an unwanted stump but also provide nutrients to your garden at the same time.
That’s what we refer to as a palm-palm scenario! Therefore, keep in mind that burning that recalcitrant stump can be the economical, environmentally responsible, and successful solution you need before you grimace at it.
How to Get Your Tree Stump Ready for Burning
Are you prepared to light your tree stump on fire? Hold on, we need to conduct some preliminary work first. The secret is to assist the fire in spreading deeply into the stump rather than merely starting one on top of it. And a drill with a big bit will be your new best friend for that. Put on your protective gear and start working. Make 8 to 10 inch deep holes on the top of the stump using a drill. Aim to space these holes about an inch apart. By doing this, the fire is guaranteed to burn the stump all the way through, not just on the surface.
- Your stump should now resemble Swiss cheese, so it’s time to apply a high-nitrate fertilizer, the secret ingredient. Fill the holes you just drilled with this. The fertilizer will serve as a burning aid, assisting the stump in burning more thoroughly and efficiently, in addition to providing an extra nutritional boost. Your unyielding stump is now prepared for the ferocious farewell.
- Give your tree stump some time to absorb the fertilizer after it has been properly soaked in it before continuing. Recall that patience is essential to accomplishing a thorough and successful burn. Burning a tree stump basically entails digging deep holes for a more efficient burn, filling those holes with high-nitrate fertilizer to facilitate the burn, and allowing the fertilizer to absorb before lighting the stump.
- Take a about two-foot-diameter oak tree stump, for example. Before lighting it on fire, you would drill around 15 to 20 holes in it, fill them with fertilizer, and then wait a few days for the fertilizer to properly sink in. Your tree stump will burn more effectively and completely if you properly follow these preparation measures, leaving behind less debris. Just bear in mind that this procedure needs to be used carefully, adhering to fire safety regulations.
Safety Tips to Remember When Setting a Tree Stump on Fire
While it can be an exciting way to say goodbye, it’s crucial to prioritize safety when lighting a tree stump. Knowing your local fire codes and following them is the first step to a safe burn. To be sure you’re not lighting up in violation of any laws, do some research or call your neighborhood fire department. Additionally, remember to obtain all essential permits, if needed.
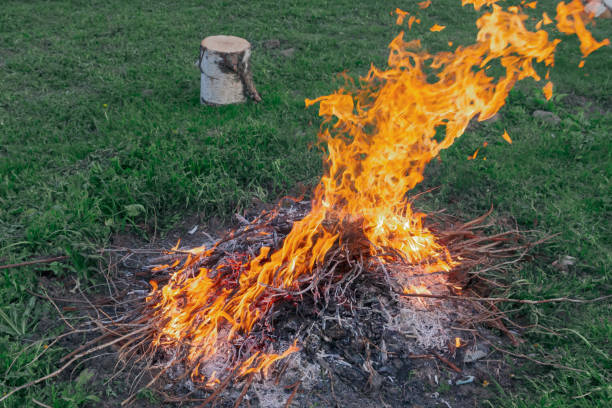
- Choosing the appropriate day for the burn is also crucial. Choose a day with calm, slightly moist weather. These circumstances aid in preventing the fire from unintentionally spreading. Make sure the area around the stump is ready before you even consider lighting a match. Clear the area of any combustible materials to establish a secure, regulated burning atmosphere.
- Let’s discuss being ready for emergencies. A nearby water source or fire extinguisher should always be present. Remember, it’s always best to be safe than sorry, even though this is a controlled fire. Furthermore, remember that burning a tree stump is not something you can do once and then forget about. Never stop watching the flames. Even tiny flames that go unattended can grow quickly and become dangerous.
- In conclusion, setting a tree stump on fire may seem like an exciting adventure, and it certainly can be, but safety should always come first. You can ensure that your stump burning experience is safe and successful by adhering to local laws, selecting the appropriate weather, setting up your area, and having emergency supplies on hand.
An explanation of the actual burning process
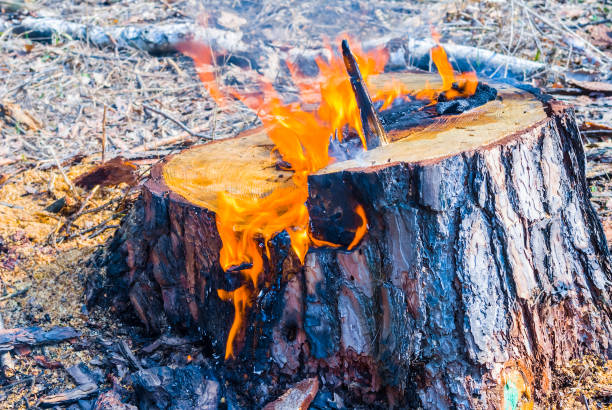
It’s time for the show now! You’ve prepared your stump, completed your homework, and taken all necessary precautions. It’s time to start doing the actual work, which is to burn the tree stump. Establishing a strong foundation for your fire is the first stage. To achieve this, stack scrap wood pieces atop your stump. Imagine doing it like you would a little campfire on your tree stump.
- Are you ready for some fire? Light the leftover wood. The magic starts as soon as the fire catches. It will become evident to you that the fire is slowly consuming the wood and penetrating the stump. This could take several hours to several days, depending on the size of your stump. You heard correctly—days! So pull out your best lawn chair, settle in, and continue to add scrap wood to the fire as needed. Remember that when burning a tree stump, patience is not only a virtue but also a need.
- The fire will gradually move down the stump as long as it burns. Remember, we want to burn the stump from the inside out, not merely scorch the outside. We drilled the holes and applied the high-nitrate fertilizer for this reason. By using this technique, the fire is guaranteed to burn the stump completely and effectively right to the core.
- Never leave the fire unattended while doing this. Remember that fire is unpredictable and can quickly become out of control if it is not properly monitored, even though it may appear tiny and controlled. Make careful to constantly monitor your burning stump and keep your fire extinguisher supplies close by.
- That’s it, dear! Not only are you burning the stump, but you’re also removing it in a methodical, efficient, and ecologically responsible manner. With a little perseverance and safety precautions, you should soon have a landscape free of stumps that is ready for your next gardening effort.
Utilizing the Ash and Cleaning Up After the Burn
It’s time to roll up your sleeves and begin the concluding phase of this adventure: clean-up time, when the last flickering flame goes out and all that’s left of your once-bothersome tree stump.
- Safety is the foremost priority at all times. Verify that no more embers are concealed by the ashes. If any are discovered, put them out right away with water. Here, too, patience is essential. Before entering, let the area cool fully. We assure you that the last thing you want as a memento of this journey is a burn from hot ash.
- It’s time to start working once the area has cooled. Pick up a good shovel and begin clearing the bones of your once-powerful opponent. You’ll see that a hole is beginning to form where the tree stump used to be as you work. And voilà! Now your landscape is truly free of stumps!
- But wait, don’t throw away those ashes. Recall how we discussed the potential dual function of the ashes? It’s time to work that magic now, though. Your stump burn’s ashes are extremely nutrient-rich and work well as a natural fertilizer.
- To make a compost that is rich in nutrients for your garden, combine the ashes with the soil. This combination of ash and soil will enhance the texture and structure of your soil in addition to increasing its fertility. The finest aspect? With this zero-waste method, the ashes from your stump fire can really benefit your landscape.
- There you have it, then. A voyage comes to an end when it leaves a tree stump behind and begins again when it enters a flourishing garden. You’ve completed the task of burning a tree stump, making sure that everything went smoothly and safely. It’s time to relax now, take in your beautiful, uncluttered landscape, and begin daydreaming about your upcoming gardening endeavor. And never forget that the plants in your garden of the future are being nourished by the ashes of your previous tree. How about making a complete circle?